Flower Crowns with Posey Pop
I get so excited when the blooms of Spring start peeking through! Even though Southern California weather makes it pretty easy to get outdoors all year long…there is something so fresh about Spring. And to me it’s alllll about the pretty flowers when the garden starts to bloom again. My mind starts turning with ideas of ways to incorporate the fresh flowers and greenery. Little arrangements tucked around the house, special deliveries to friends…and flower crowns! How can anyone resist the sweet and whimsical nature of a flower crown?
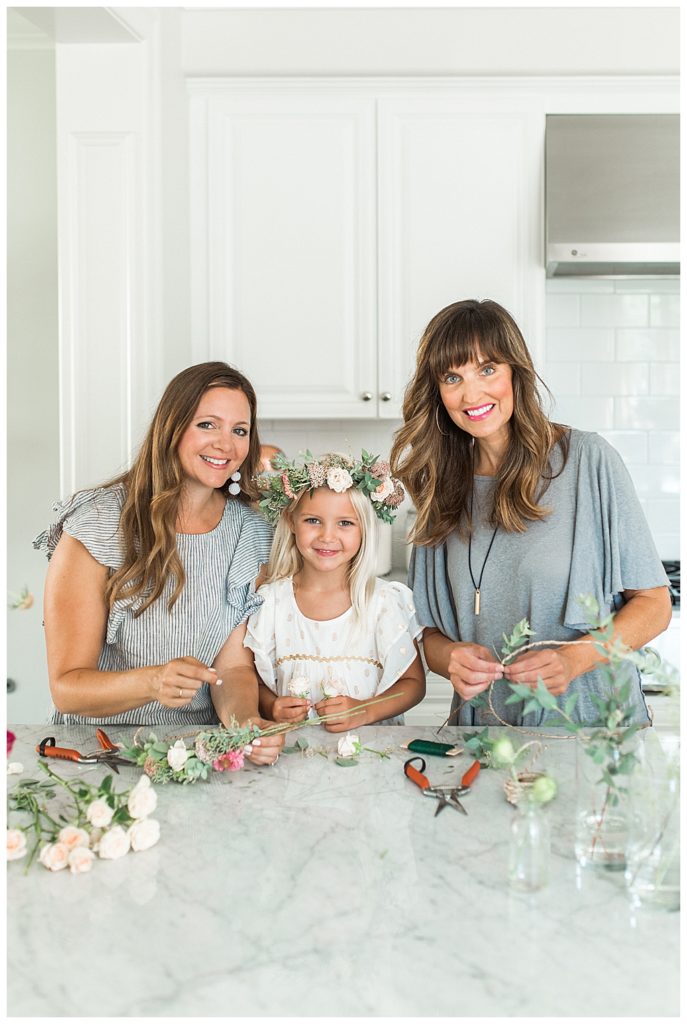
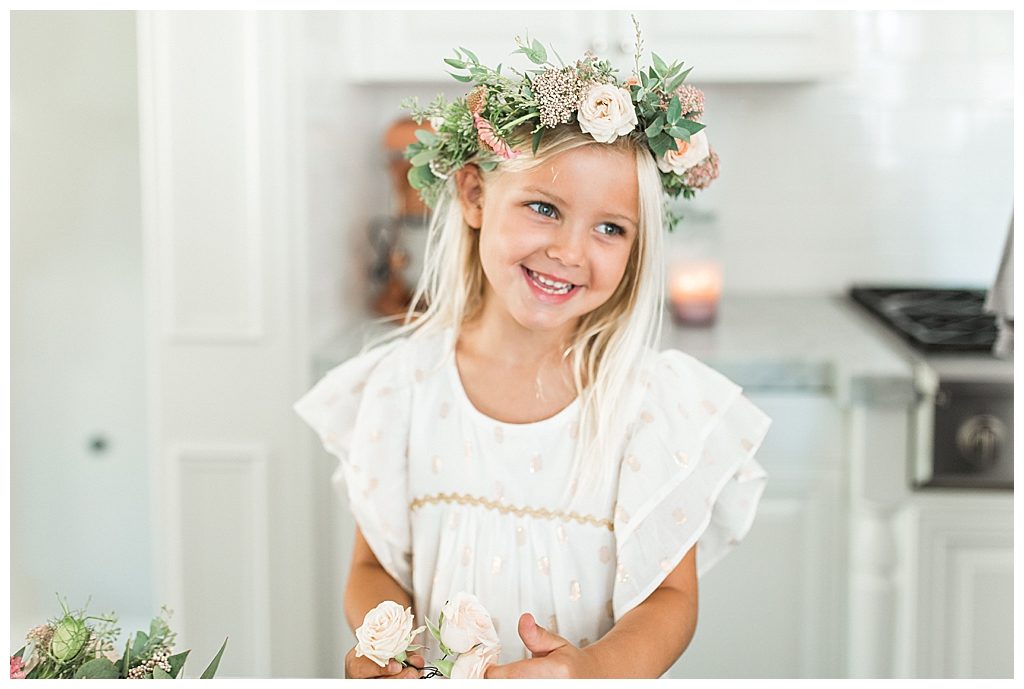
I have always wanted to learn how to make these darling crowns myself, so I reached out to the incredibly talented Marianne from Posey Pop. I was thrilled when she agreed to come over for a little DIY morning. With planned activities for my bigger kids already happening and Emmy happy with Daddy, I knew it would be the perfect opportunity to have a little special time with Charlotte. She was SO excited to learn that just she and mommy would be learning how to make these beautiful crowns!
Marianne was sweet enough to bring us all of the materials we needed including the tools and gorgeous blooms! You can find the full tutorial below!


Flower Crown Tutorial
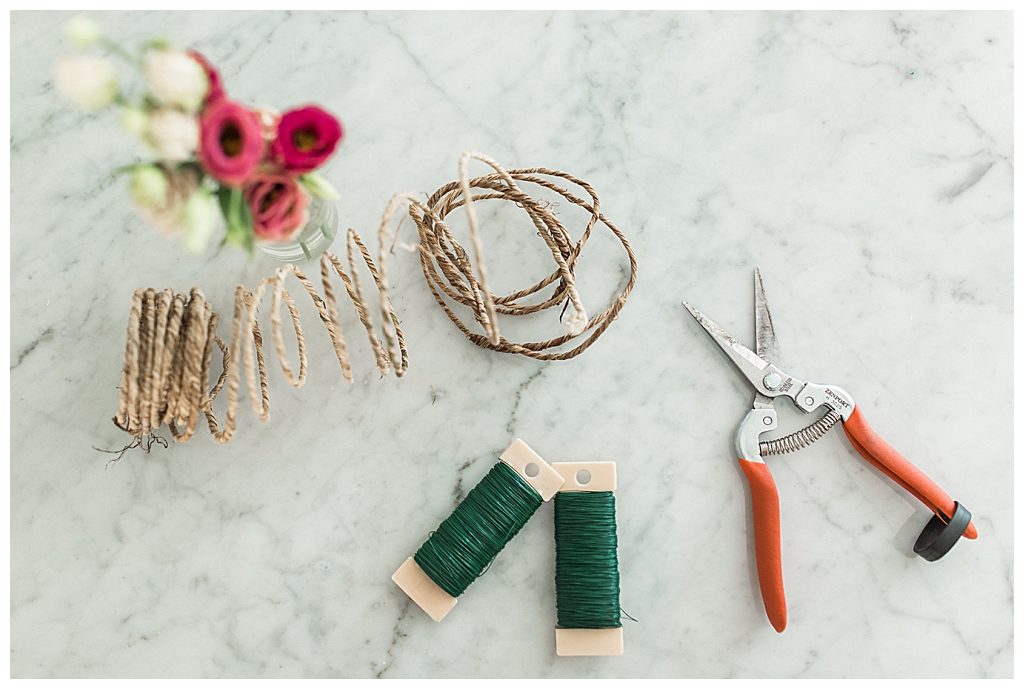
Materials:
- Naturally Wired Twine (here)
- Wire Cutters (here)
- Floral Wire (here)
- Floral Cutters (here)
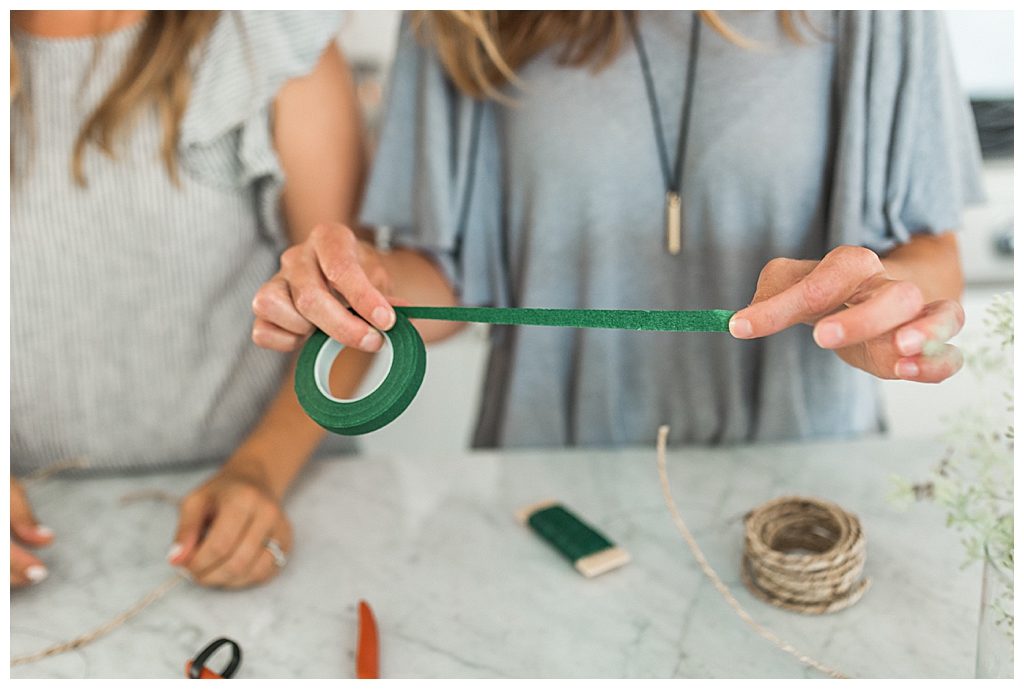
- Floral Tape (here)
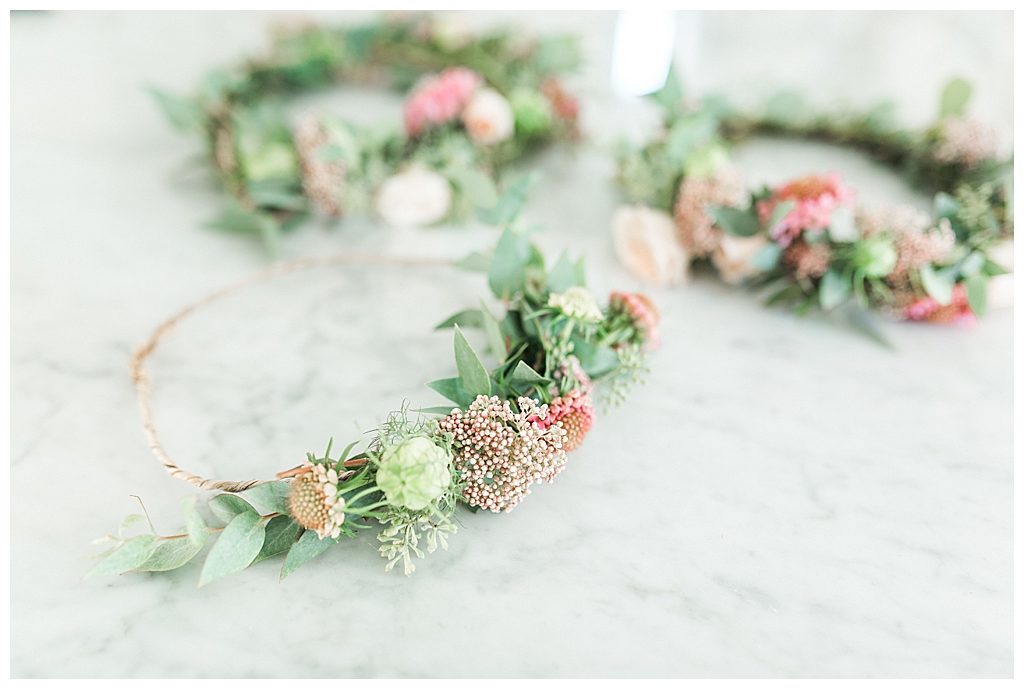
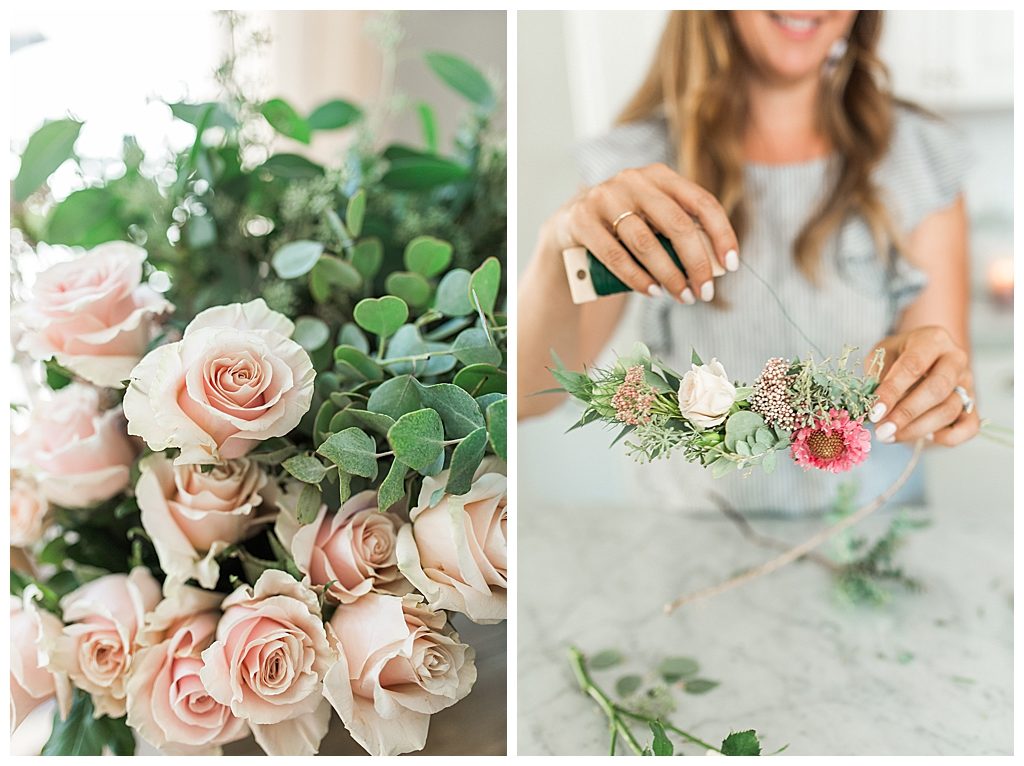
- Flowers and Greenery – roses, wax flower, seeded eucalyptus are all good options but use anything you love!
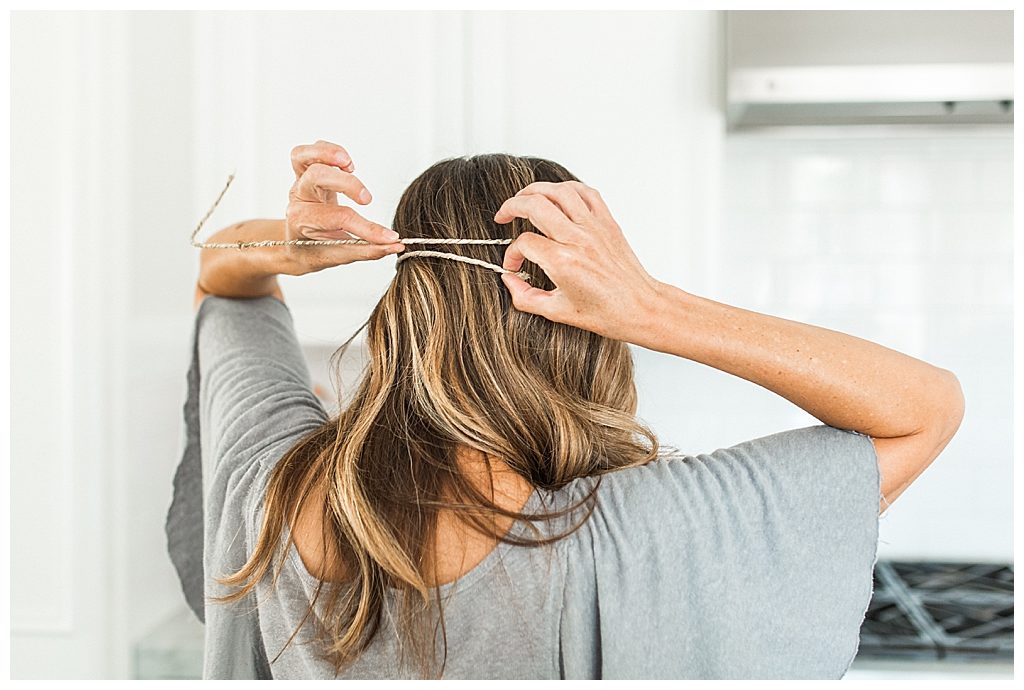
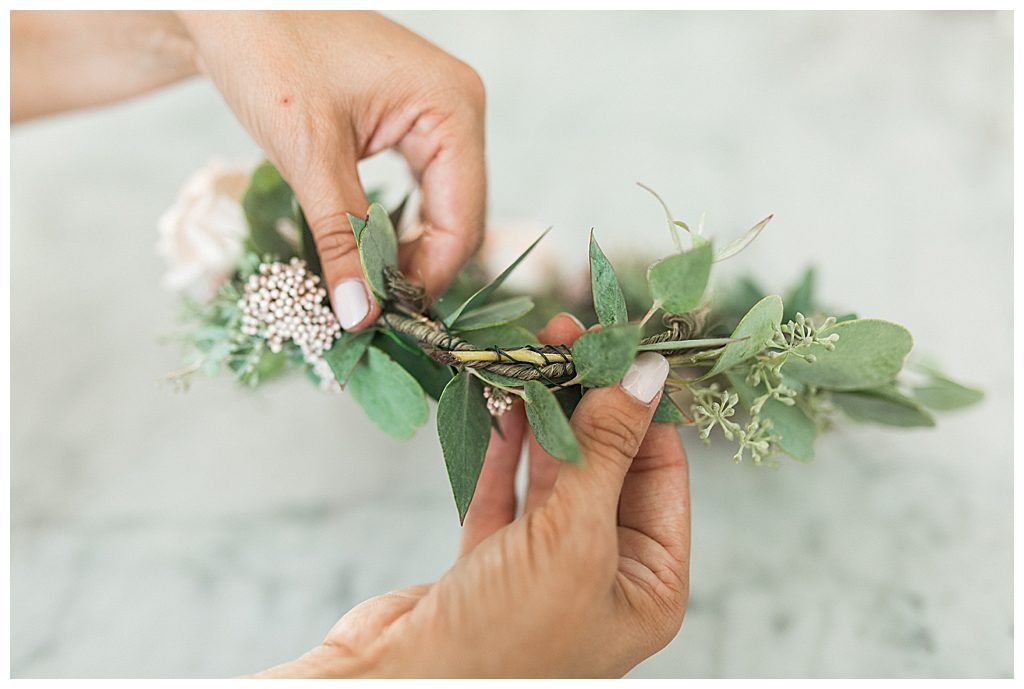
First, use the twine to measure the approximate diameter for your head (or whoever will be wearing the crown), and then cut the twine a few inches longer.
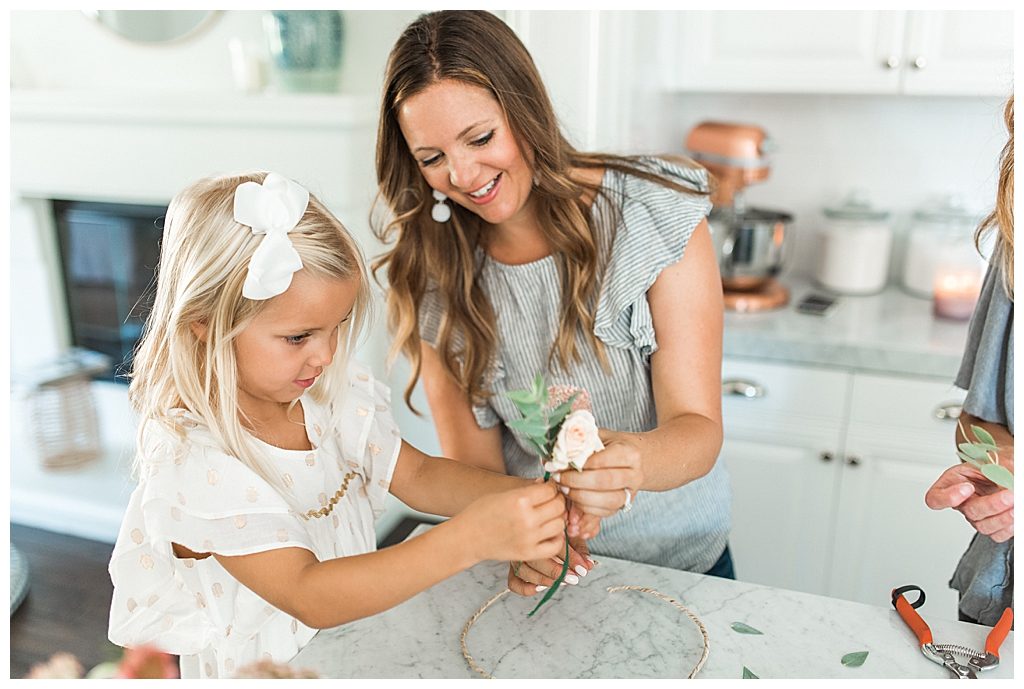
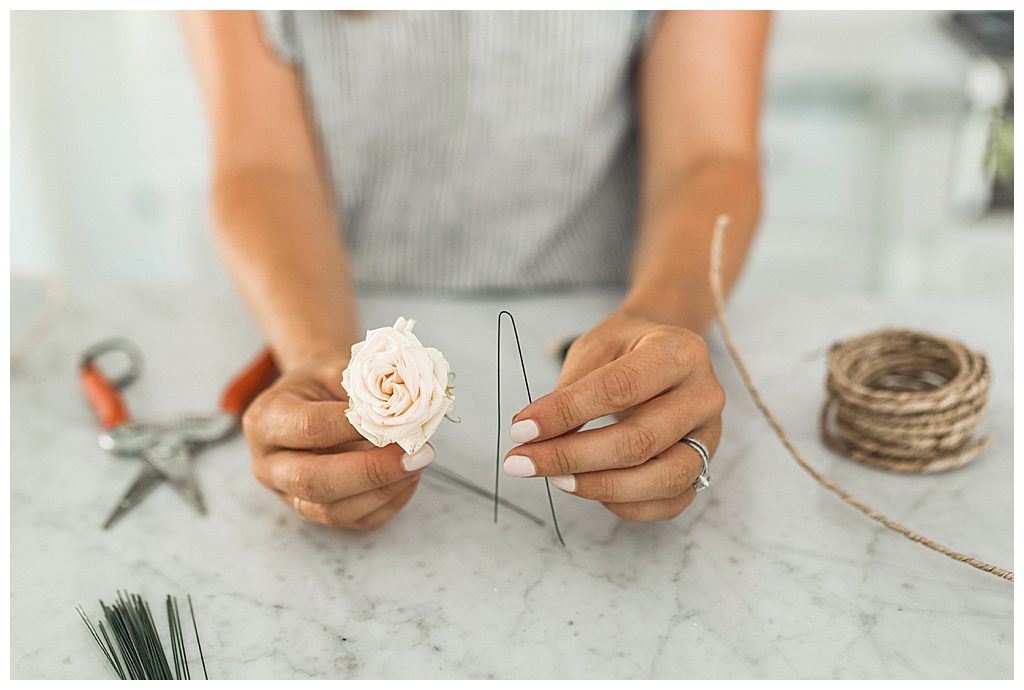
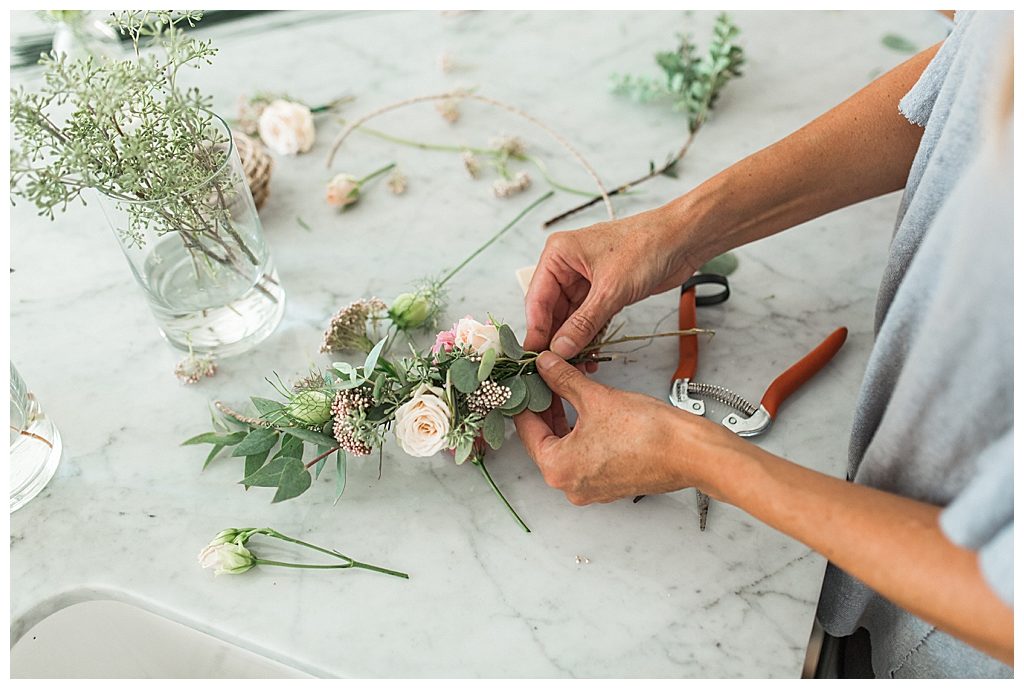
Next you’ll begin wiring any roses you want to use in the crown. Start by cutting the heads of the roses off the stems, leaving just 1-2 inches of stem. Take your wire, fold it in half, and then stick the two open ends straight through the top of the rose. Once through, twist the ends of the wire to secure. Do this for however many roses you plan on using for the crown.
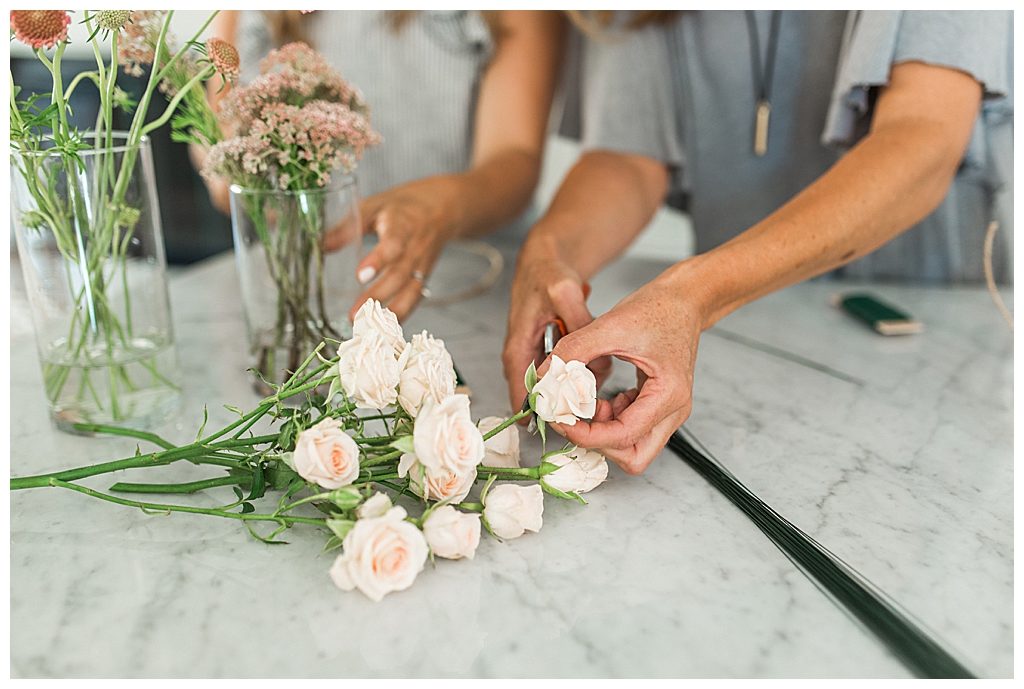
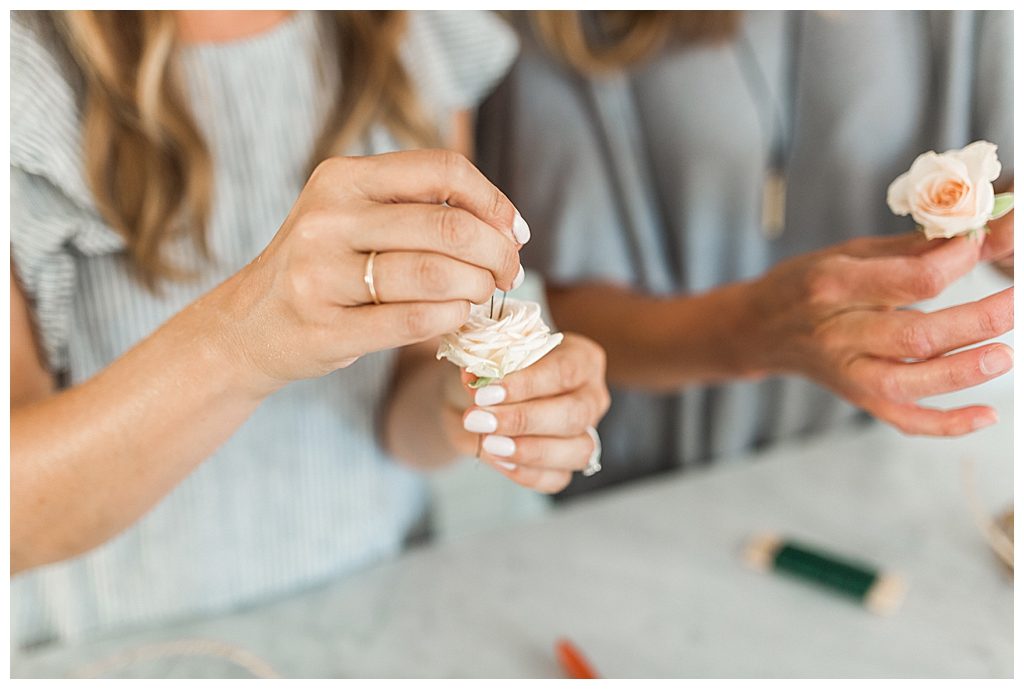
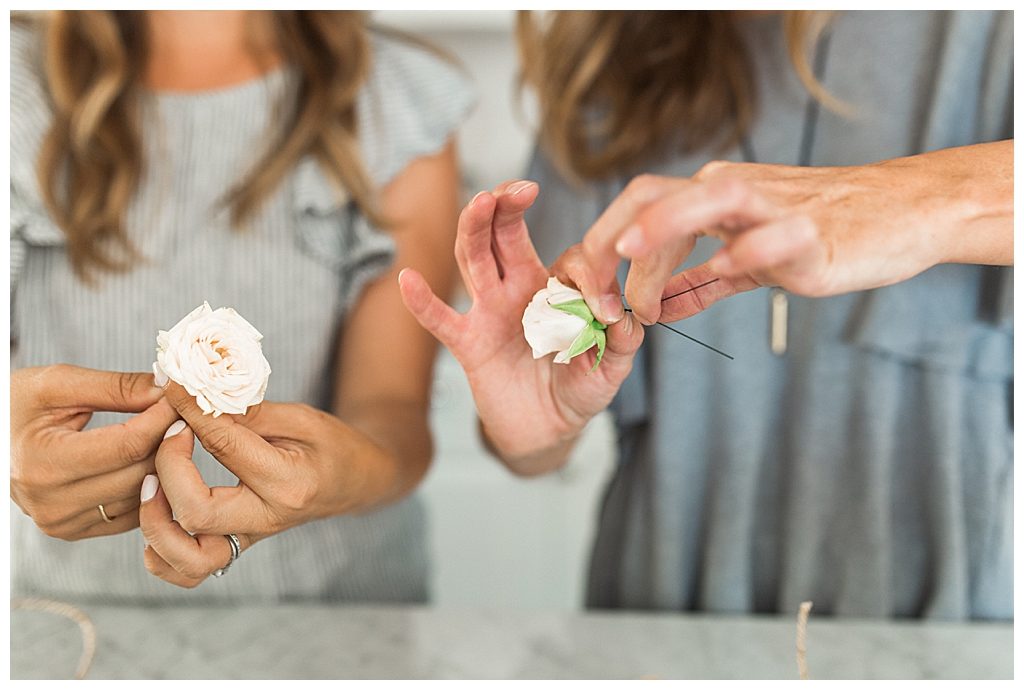
Once you have your roses wired, you can choose to leave them plain as is, or add a small amount of greenery. To add the greenery, simple wrap floral tape around the wired rose stem and greenery stems together. This will form a mini bundle.
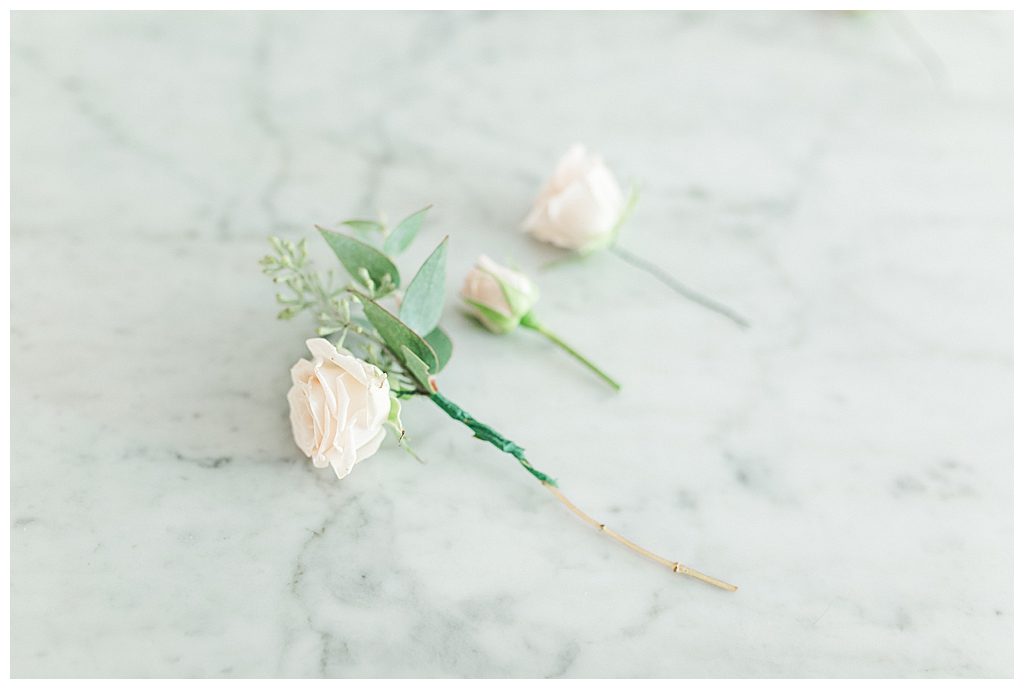

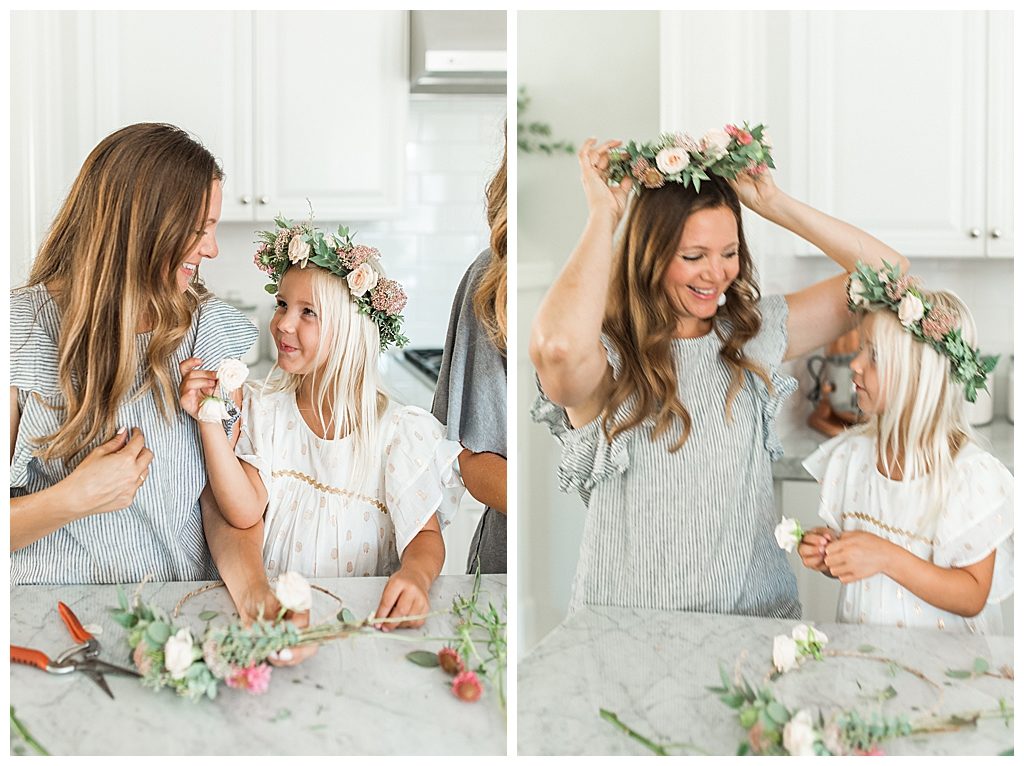
You’ll want to make several of these little ‘bundles’ by using a variety of greenery and flowers. Then it’s time to start attaching them to the twine. Start by layering one or two of the bundles along the twine, overlapping slightly. Hold the bundles and twine in one hand, and in your other start wrapping the floral wire around both the bundles and twine so that they are connected. Continue layering in bundles onto the twine and wrapping in wire. There is no right or wrong way to add in the flowers, just do what you think looks best! You can wrap them all the way around the twine, or only halfway….both create a beautiful look!
After adding all of your flowers and greenery, bring the two ends together and connect by wrapping the twine together, or using additional floral wire to secure. And there you have it!!
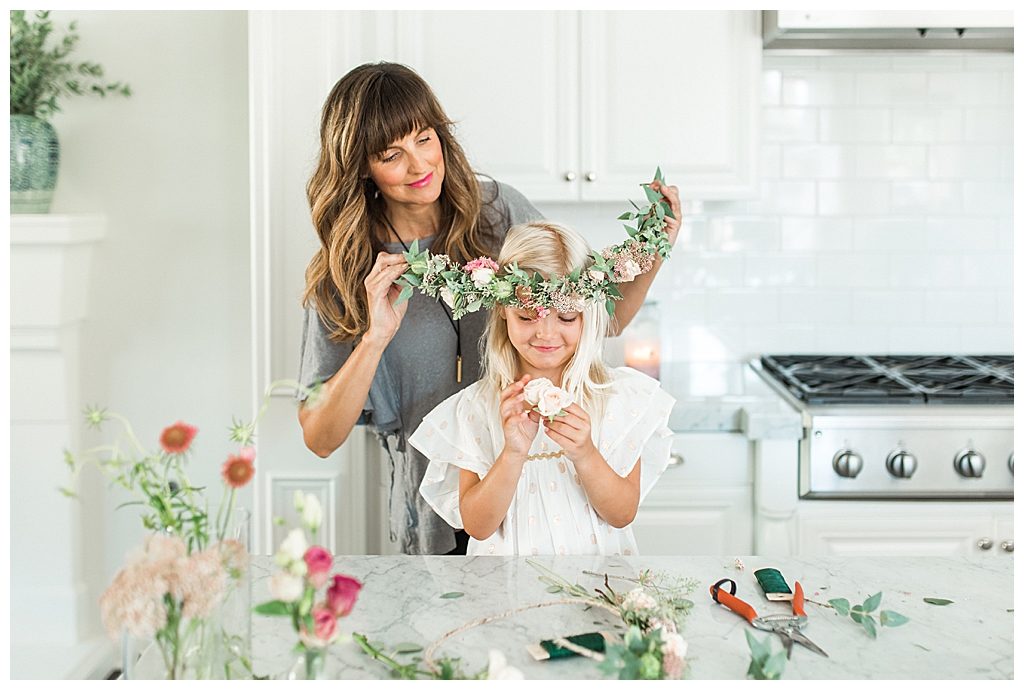


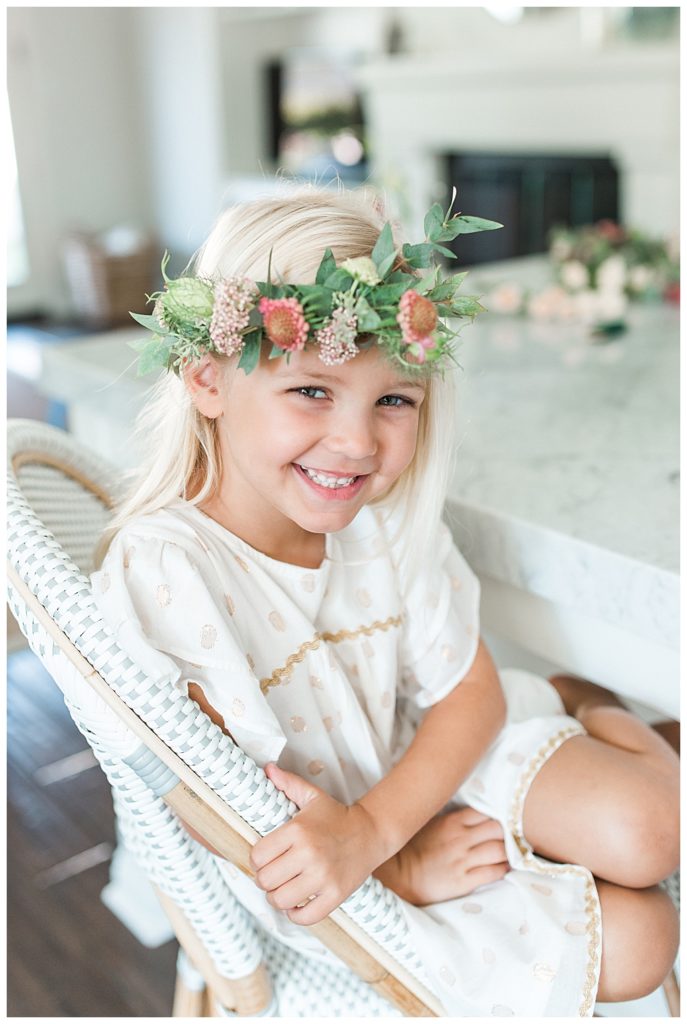
Most importantly, have fun with it and enjoy the process!! The technique is actually quite easy once you get the hang of it!
All photos by Vanessa Lentine